So I had this post slated for Dec. 13th, but I got a teensy bit distracted by the whole omg-i'm-getting-engaged thing ;) And then it was pre-holiday craziness on the 20th, and December clothes budget posting on the 27th, and here we are. But I guess that's okay, because it is freaking COLD outside throughout most of the U.S. (and Canada, I can only assume). So you should probably make this to warm yoself up, like, now. When you do make this recipe, you will understand my need to deeply and profusely apologize for the delay. I'm not even kidding. This is one of the best--and easiest--soups I've made, probably ever.
I honestly just started drooling.
With a lot of potato-based soups, you have to puree the potatoes after you cook them to create a smooth, starchy base. Not so with this one; it's chunky and delicious. Which is good because my blender is crap, I don't have an immersion blender, and my food processor is most definitely not liquid-tight. Why yes, I have splattered my walls during an ambitious attempt at another potato-based soup.
Now normally, I adapt recipes a bit and post the adapted version in full here. But with this dish, I pretty much followed it to a T. I think I omitted the carrot and celery, because we didn't have any, and sprinkled a little dried celery seed over the potatoes as they cooked.
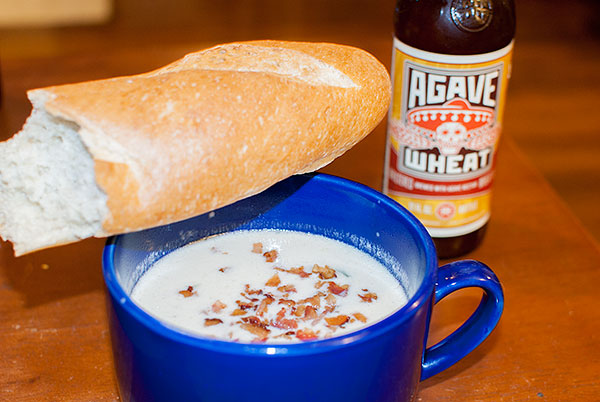
The one thing I didn't really like about the recipe linked above is that it just called for any "light-colored ale." Now, I'm not a big beer drinker and was about to just use good ol' Budweiser or something. But guess what. That's a lager. And apparently, that makes a difference. So I sent Matt out to find something, and he came back with the beauty pictured above: an Agave Wheat ale from Breckenridge Brewery. Wheat beers are one of the few styles I enjoy, so I had one with dinner and it was delicious. If you can't find this exact brew, any non-flavored wheat beer (i.e., no fruit flavors) or even a more bitter IPA would do just fine.
Oh, and one last tip: Make sure you get a good, crusty bread or baguette to go with this. I am not exaggerating when I say you will want to soak up every last drop from the bottom of your bowl! Matt and I literally collapsed onto the couch after dinner; it took several minutes to muster up the energy to clean up afterwards. Food coma for the win!
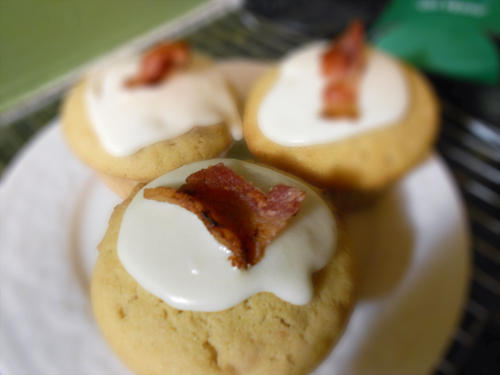
You read that correctly. As a little birthday treat to four of my friends (who all have a birthday within one week of each other), I made maple-bacon cupcakes and took them to the joint birthday party. And they. were. phenom.
 These are pretty easy, but a little time-consuming, especially if you don't have a griddle to cook all the bacon at once. But boy, are they worth it. This recipe makes 15 to 24 bacon-y bits of goodness, depending on how full you fill the cupcake liners.
Ingredients:
These are pretty easy, but a little time-consuming, especially if you don't have a griddle to cook all the bacon at once. But boy, are they worth it. This recipe makes 15 to 24 bacon-y bits of goodness, depending on how full you fill the cupcake liners.
Ingredients:
- 3 cups flour
- 2 tsp baking powder
- 1/2 tsp salt
- 2 sticks (1 cup) butter, room temperature
- 1 1/3 cups brown sugar
- 4 large eggs
- 2 tsp vanilla extract
- 2/3 cup buttermilk
- 2/3 cup maple sugar
- 1 pound bacon
Preheat the oven to 350 degrees and line your muffin trays with cupcake liners. Cook the bacon until it's nice and crispy, and set over paper towels to drain. While it's draining, grab a large bowl and whisk together the flour, baking powder and salt until well-combined. Set aside about three or four pieces of bacon; chop the rest into very small pieces.
In a separate bowl, cream the butter and brown sugar with an electric mixer. Beat in the eggs, one at a time, then beat in the vanilla. With the mixer on a slow setting, stir in the buttermilk and syrup. Then gradually add the dry ingredients, using the mixer to incorporate. About halfway through, I had to switch to a wooden spoon because the batter got too thick for my crappy hand mixer. Finally, mix in the finely chopped bacon pieces.
Carefully spoon the batter into your cupcake liners. I filled mine too full and had fewer cupcakes; I'd recommend filling them 1/2- to 3/4 full for more, smaller cupcakes. Or you know, fill them all the way for fewer, giant cupcakes. Anyway, bake 15-18 minutes, or until a toothpick pushed into the center of a cupcake comes out clean.
After the cupcakes are done, remove from the pan and set on the counter or a cookie rack to cool. While they're cooling, you can make the icing. The icing I made didn't turn out too well, so I'm not going to include it. (Unless, you know, you guys want that recipe. For what it's worth, I didn't like it...it was just powdered sugar, butter, milk and maple syrup.)
After the cupcakes are fully cooled, top them with frosting. Grab those last three or four whole pieces of bacon and chop them into large pieces, to garnish the top of the frosting. Try not to drool.
(Pro-tip/fat-kid-tip: One of my friends said he ate a few cupcakes for breakfast the next morning because they tasted like pancakes...he toasted them and slathered them in butter. Oh. My. God. Why didn't I think of that?!)
Well, the madness is in full swing. In the last two weekends, I've hosted/gone to two bachelorette parties and attended a quadruple-birthday party. Sadly, I didn't have time for outfit photos for any of these events, so I'll have to reshoot them later this week. Before Friday, when I head out of town for Abby's wedding (!!!)
Anyway, here are some pics of what I've been up to:

Cassie, Anna, Katie, Ellen, Sarah, me, Abby, Chelsea and Courtney at Abby's bachelorette. Photo taken by my mom, edited by Sarah.

Me, Abby and Ellen...sisters are fun! Photo taken by Chelsea. (Rudely-shaped straw blurred for propriety's sake by me, haha.)

Tiffany, Amy, Emily, me, Theresa and Jessica at Tiffany's bachelorette. Photo by the waitress at Bar Louie.

Bacon-y goodness.
Needless to say, it's been a lot of fun so far. And don't worry, I will be posting the recipe for those maple-bacon cupcakes for Food Friday. I made them for the quadruple-birthday party last night. (Four of our friends have birthdays within a week of each other, so we celebrate them all at once for the sakes of our livers, haha.) Those cupcakes tasted like breakfast :)
This is, without a doubt, one of my absolute favorite recipes. It's easy, it's DELICIOUS, and it's something of a family recipe. Since there's no real secret, and I've added my own personal touches to the original recipe, I've decided to share it in all its cheesy, bacony, mouthwatering goodness.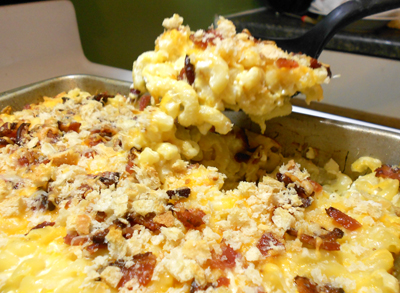 Ingredients:
- about half a box of elbow macaroni (rotini, rigatoni or bowtie pasta would probably work well too)
- a bread-bowl-sized roll of sourdough bread
- 4-5 strips of bacon
- about 1/2 to 2/3 cup cottage cheese
- about 1/3 cup sour cream
- 1 egg
- 16-oz package of shredded cheese...I like to use a three-cheddar blendAs with most of my recipes, nothing about this is an exact science. That's what makes it fun! So let's get started.First, bring water to a boil in a large pot and preheat your oven to 350 degrees. In a separate pan, start cooking the bacon. When the water is boiling, add a good dash of salt and the noodles of your choice and cook until just past al dente. (You want them to be pretty soft, since they're going in the oven.) When they're cooked, drain and return to the pot, off-heat.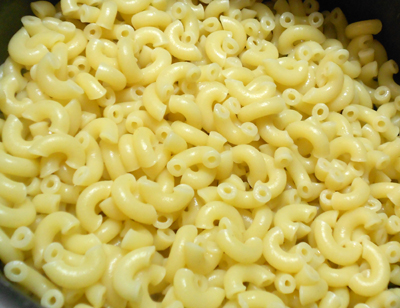 Meanwhile, cook the bacon to a nice crisp that will be easy to crumble into pieces. Also meanwhile, rip the sourdough bread into small chunks and throw, a few pieces at a time, into a food processor. Pulse until you have very fine breadcrumbs. You'll have WAY more than you need, but that's okay because you can freeze them and use them for other recipes later. Way to plan ahead!
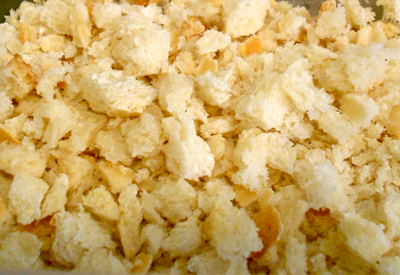 Okay, so the noodles are already cooked and drained. You now want to do the same with the bacon—lay 'em on a few layers of paper towel, cover with another paper towel and press gently to remove the extra grease. Let cool.
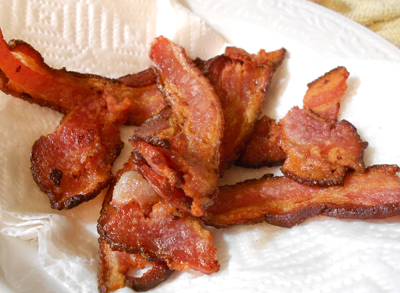 While the bacon is cooling, use a wooden or plastic spoon to mix the sour cream, cottage cheese and egg into the noodles. Make sure the egg yolk gets broken and thoroughly mixed in. Then, mix in about half of the bag of shredded cheese.
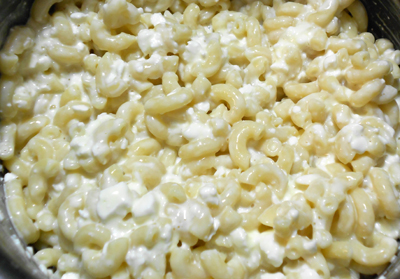 Spray a baking pan (I think mine is appx. 9"x13"?) with cooking spray, then spread about half of the noodle mixture into the pan. Sprinkle with a little layer of shredded cheese. Spread the rest of the noodles over that. Crumble the bacon into little pieces over that, then cover the whole thing with the remaining shredded cheese. Remember, there is no such thing as too much cheese.Bake, covered with foil, for about 15 minutes or until the cheese on top is melted. Then uncover, sprinkle with the breadcrumbs (betcha forgot about those delicious morsels) and bake uncovered for about another 15 minutes, or until the crumbs are all nice and toasty. Try not to eat the entire pan in one sitting...because this also makes a great next-day leftovers meal!
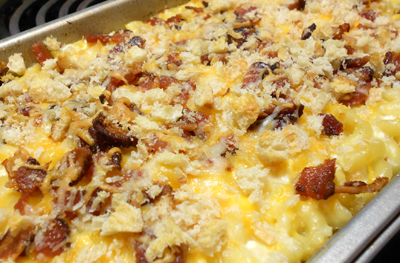 Oh man. I die.
It's been a while since I did a recipe post, mainly because it's been a while since I've actually cooked something delicious and not just fried some chicken to serve with instant mashed potatoes and frozen veggies. Let's face it...summertime is not exactly made for spending in a hot kitchen.
But I had this photo sitting in my "unposted photos" queue, so I figured why not? It may not look very pretty, and in fact it's quite messy to eat, but this burger was deeee-licious!
Ingredients:
- 1/2 lb ground turkey
- parsley
- garlic powder
- 6 slices bacon (I used applewood smoked)
- 5 eggs
- cheese (I like Colby-Jack, but cheddar is also good)
- 4 English muffins
In a large bowl, combine the ground turkey, one egg, and a dash each of parsley, garlic powder, salt and pepper. Don't over-season, you just want to give your burger a little background flavor. (Note: You can see from the photo that I didn't do this next step, but trust me, it's a modification that will make chowing down a bit easier.)
Chop the bacon into small pieces (it helps to stick it in the freezer for about 15 minutes first) and add it to the turkey burger mixture. Mix everything together really well, incorporating the egg into all of it so the burgers won't break up.
Shape the meat into 8 mini-patties. You want them to be relatively flat, and slightly larger than the circumference of the English muffins, because the patties will shrink up a bit when you cook them. Cook in a frying pan over medium-high heat for a few minutes on each side to get a good sear on the outside, then reduce heat and cover with a lid, cooking for several minutes more on each side.
While the patties are cooking over low heat, crack the other 4 eggs into another skillet that's been sprayed with cooking spray (or, if you're a fat kid at heart like me, grease up the pan with butter). Break the yolks and fry those babies up! (Again, you'll notice I cooked my egg over-medium, so the yolk was still runny. While this was delicious, it was also really messy and really difficult to eat. I definitely suggest yolk-breakage.)
Just before the burgers are finished, top them with the cheese of your choice. Cover again for about a minute so the cheese will melt. Divide the fried eggs into 8 sections and top each burger with one. Each burger will be relatively small, so this recipe will really only serve four. Two mini-burgers is a great portion size :)
And the best part? These taste great in the morning or for dinner. Yum!
I'm so excited to stop by our apartment complex's pool after lunch today! It opened this weekend of course, and the high for today is supposed to hit the lower 90s, so it couldn't be more perfect. I still have a bit of work to do, but that can wait till this evening. It's a pool day!
For dinner, I think I might do this recipe from a few weeks ago. I adapted it from one of Rachael Ray's cookbooks, and it's just fantastic. I season it with some applewood-smoked sea salt from a shop in the North Market here in Columbus. It really adds some depth to the dish!

Tilapia with Balsamic Brown Butter and Creamy Tomato Farfalle
Ingredients:
- extra virgin olive oil
- 5 slices bacon (I like to use applewood smoked), chopped
- 2 shallots or 1 small onion, chopped
- 2 6-oz cans plain tomato sauce
- 4 tilapia filets
- 1/2 cup flour
- 1 box farfalle bow-tie pasta
- about 1 1/2 cups frozen peas
- 1/4 cup cream
- 3 tbsp butter
- 1/4 cup balsamic vinegar
- fresh basil (optional)
Start by bringing a large pot of water to a boil. While that's heating, heat about a tablespoon of oil in a large, deep skillet over medium high heat. Add the chopped bacon and cook until crisp. Add the onions and season with salt and pepper, cooking until tender but not quite browned, about 5 minutes. Add the tomato sauce and simmer for about 10 minutes so all the flavors mix together.
Season the fish with salt and pepper, dust with the flour and shake off any excess. Heat about 2 tablespoons oil in a large skillet over medium-high heat. Cook for about 4 minutes on each side, until it flakes easily with a fork. Remove to a separate plate and cover with foil to keep warm.
While the fish is cooking, salt the pasta water (here's where I use the applewood smoked salt) and add the pasta, cooking to al dente. Also, stir the frozen peas into the tomato sauce. Bring it back up to a low simmer and add the cream. Season with salt and pepper if needed. (Again, I throw in some of the applewood smoked salt if I think the dish needs a bit more smokey flavor. I use regular salt if the bacon has done its job.)
Add the 3 tablespoons butter to the pan the fish cooked in. Brown over medium heat for 2 to 3 minutes, then stir in the balsamic vinegar and simmer until it reduces by half, about a minute or two. Pour over the fish.
Drain the pasta, toss with the sauce and wilt the basil into the sauce if using. Serve together.

