
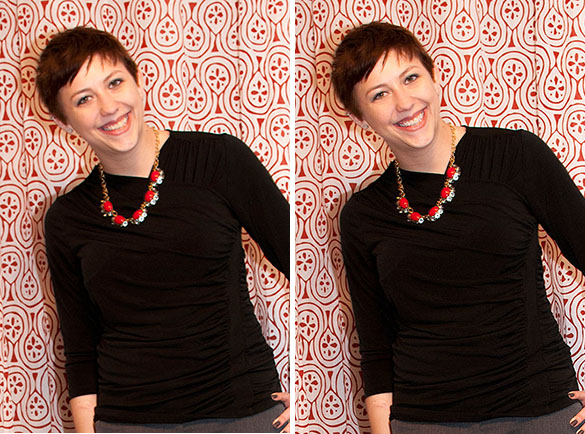
So here's a little before-and-after for you. On the left, you'll see what looks like a booger coming out of my nose. I promise you, it's just my nose ring. (As if that's somehow less gross??) You'll also notice that my teeth on the left look a bit on the dull side, so I brightened them up in the final product. And of course, I've done my under-eye-shadow concealer trick from last week as well.
Ok, now let's get to editing. We talked last week about how important it is to create a new layer from your original image, in case you make mistakes. I didn't get a screen grab of that process, but I did it.
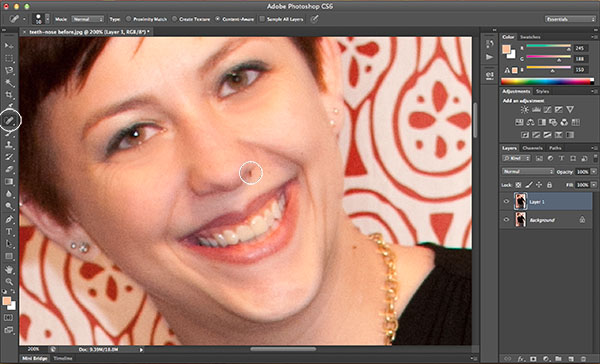
We'll start with fixing the nose ring. Just select the Spot Healing Brush tool from the bar on the left. Make sure it's "Spot Healing" and not plain old "Healing." The former automatically selects correction colors based on the surrounding tones, whereas the latter makes you select the colors. Basically, the Spot Healing Brush is a one-click wonder. Choose a brush size that's slightly larger than the area you want to correct — you'll remember from last week that this is done either by right-clicking or via the dropdown box in the top left of the window. Then just click the offending spot, and it's gone!
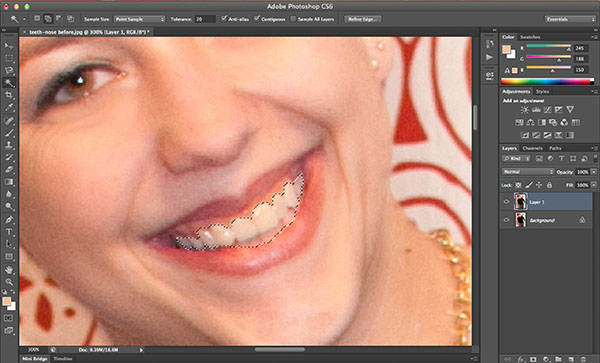
Now, on to the teeth. Using the Magic Wand tool, select just the teeth in your picture.
While the teeth are still selected, use Command+J (Control+J on a PC) to create a new layer of just the teeth. In the photo below, you'll see the circled layer on the right side appears to be blank. That's just because the teeth are almost the same color as the background and are harder to see.
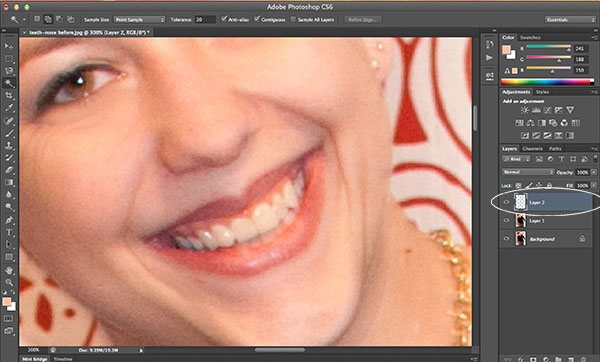
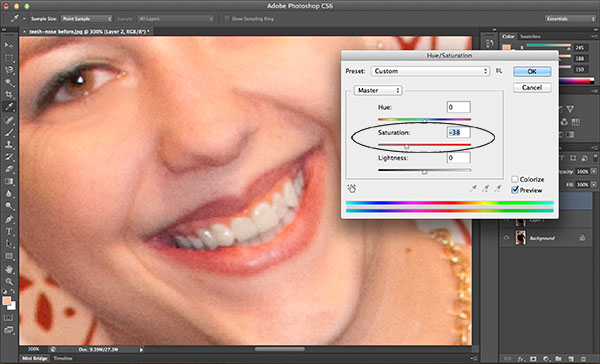
Open the Hue/Saturation panel (Command+U or Image > Adjustments > Hue/Saturation from the menu bar up top). Take the Saturation down a bit — you want the teeth to look slightly gray.
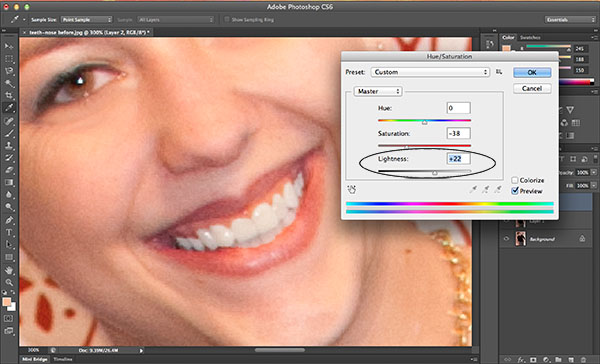
Next, increase the Lightness. Your teeth should look a bit too white at this point, and that's okay. We want them to be a little exaggerated.
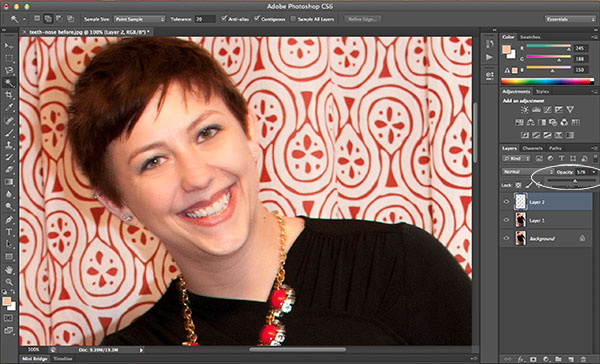
Adjust the Opacity slider for the teeth layer (see the circled bit in the image below). I find that sometimes, it helps to zoom out of the image a little to help you get an overall view of what the final product will look like. There are no hard-and-fast rules for this; just slide it until it looks right to you. This blends the original color of the teeth with the edited color for a more natural look.
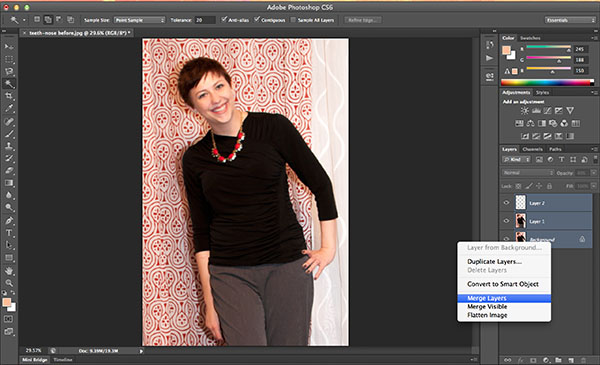
Zoom out all the way to check your overall look and adjust the opacity again if needed. When you're ready, select all three layers, right-click and select "Merge Layers" to flatten the image. (Or hey, click "Flatten Image" or "Merge Visible." Pretty much the same all around, I believe.) Make absolutely sure you're happy with your image at this point, because once you flatten, you can't really go back!
And that's it! So tell me: Anything else Photoshop-wise that you want to see tips on, so far as "makeup" goes?
Photo-editing is my salvation. The perfect way to massage my appearance into relative feminine form. These tips are good ones -- you're getting really skilled!
ReplyDelete