
Anyway, I'm coming at ya today with a Photoshop mini-tutorial of sorts. As I was editing the photos from our bouldering trip last weekend, I came across a few that turned out just horribly. I hadn't taken the time to adjust my settings, and as a result, my subject was completely dark and noisy, while the edges of the photo were in full light. Fortunately, I was able to fix it in about 30 seconds, thanks to the wonderful magic of Photoshop's RAW editor.
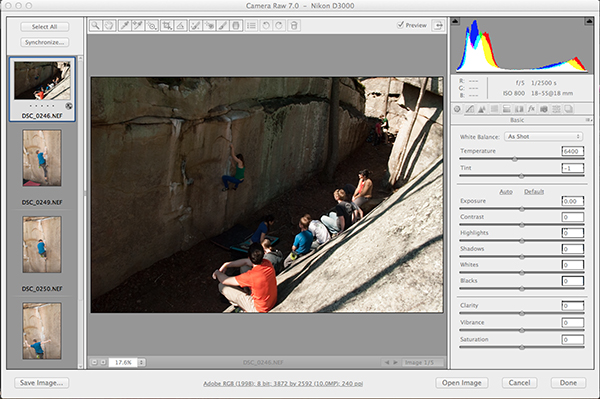
Original photo, as viewed in Photoshop RAW.
If you have this same issue, you can easily fix it yourself. You just need the following:
1. A RAW photo file that's too dark. (This won't work on JPGs, folks, which is why you should ALWAYS put your DSLR on RAW mode.)
2. Photoshop CS5 or later with updated RAW plugins.
Before I delve into this, I want to talk a little bit about camera settings and why your photo might be too dark. If you look at the settings in the top-right corner of the screenshot above, you'll notice that I was working with a f/5 aperture and 800 ISO settings. The ISO might be a tad high for outdoor shooting, but given the amount of shade I was dealing with, it isn't the worst mistake in the world. Regardless, if I had even bumped it up to 400, I would have had less issue with noise. My real problem was my shutter speed, which was 1/2500 s. While a fast shutter speed was vital for catching all those action shots, this was a bit too fast for the light level I was dealing with under that rock.
TL;DR: My ISO was too high, which resulted in a grainy (noisy) image, and my shutter speed was too fast, which resulted in a dark (underexposed) image.
So. Here's how I fixed it in post-processing.

First, I adjusted the Exposure slider to lighten the entire image. I then adjusted the Highlights slider down, to fix the glare on the properly-lit folks in the foreground, and the Shadows slider up, to further lighten the background of the image and the climber on the wall.

Next, I zoomed in on the climber to check the grain. The best way to do this is to pick a face or patch of vibrant, solid color (like her clothes), preferably something within the formerly dark area, and zoom in to 100%. See how grainy that is? That's the noise created by my high ISO. Back when I had CS4, I would have just had to deal with this for the most part. But CS5 and CS6 have some truly amazing noise reduction tools, so that's what we're looking at next.

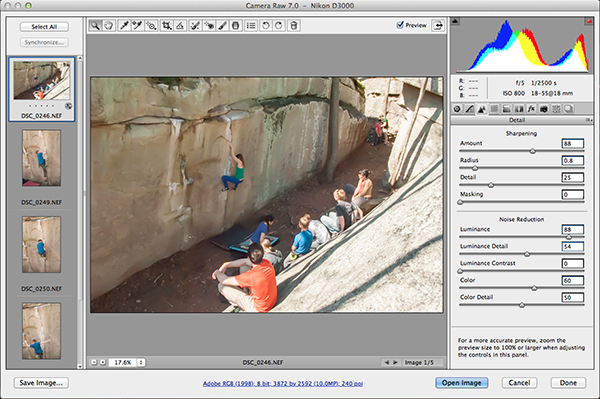
In the Detail tab (the icon that looks like two triangles), you'll find the Noise Reduction sliders. First I bumped the Luminance slider up, then the Color slider. (The Color slider may not be necessary for every image, and to be honest, I'm still figuring it out. Just play around with it to see what works for your image!) I didn't touch the Luminance Detail, Luminance Contrast or Color Detail sliders for now. So now my noise is gone, but the image looks a tad soft/blurry.

Enter the Sharpening sliders! I increased the Amount slider and decreased the Radius slider just a tad, then bumped the Luminance and Luminance Detail sliders up a touch to compensate. (I forgot the arrows on this image. My bad!)
Zoomed out, you can really see the difference in the entire image. Here's the original again, for comparison:
And there you have it! A quick and easy fix for underexposed and/or noisy photos, as well as a little lesson on why you should always shoot in RAW mode, not JPG!
Now, a quick question for you: Did I jump the gun by not providing definitions of RAW/JPG files? Or are you already familiar with the differences between the two? Sound off in the comments and I'll write a little addendum to explain, if it's needed!
Valuable info. Our cameras are so sophisticated; they can do so much. It's wonderful to see photographers like you using their capabilities. Anyone using a dSLR should know the difference between RAW and JPG.
ReplyDelete